Ceramics

Pottery Painting Ideas for Beginners How to Plan Your Design?
Pottery Painting Ideas for Beginners How to Plan Your Design

Pottery painting ideas for beginners are easier to bring to life when you have a simple plan. Before picking up a brush, look at the shape of your mug, plate, or bowl and decide where your design will go. Start with an easy pattern, such as small flowers, dots, or curved lines. Choose two or three colors that work well together and sketch your idea on paper first. This helps you avoid crowded patterns, uneven spacing, and color combinations that do not look as expected.

Beginner Design Guide

Where Should Your Pottery Design Go?

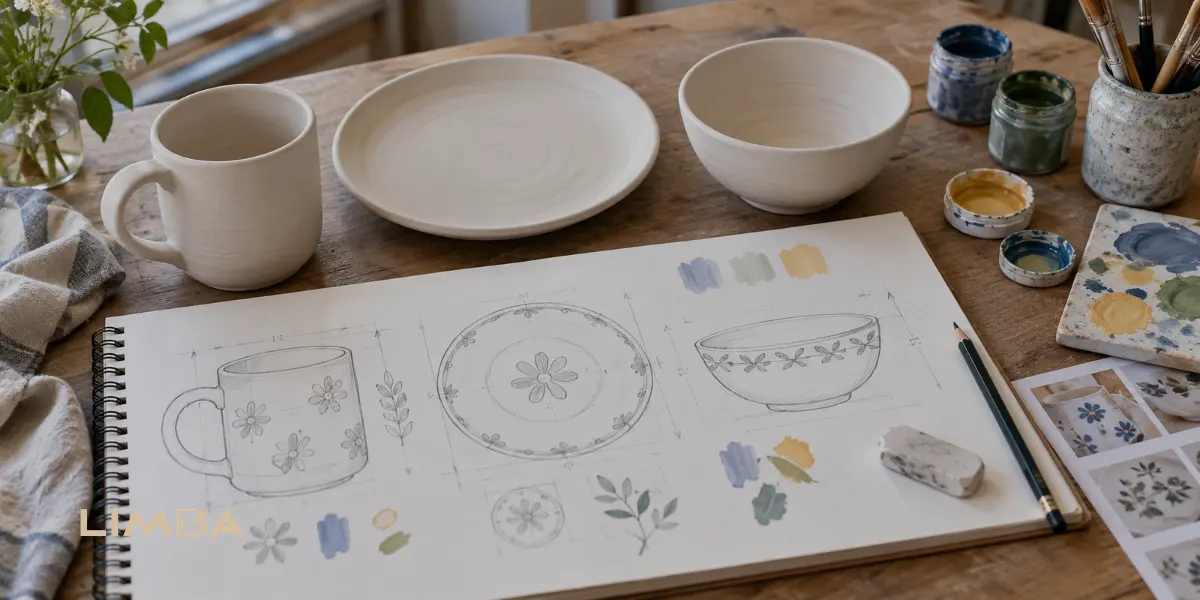
The same pattern can look completely different on a mug, plate, or bowl. Use these simple layouts to plan a design that stays visible and feels balanced.

Side View

Mug Design

Scattered dots or small repeated shapes

Best Placement

The visible outer wall, with important details kept clear of the handle.

Design Tip

Rotate the mug while planning so the pattern looks balanced from different angles.

Sample color palette
Top View

Plate Design

One central flower or a simple border

Best Placement

A single main design in the center, with smaller details around the outer edge.

Design Tip

Leave open space around the main shape so it remains the focus of the plate.

Sample color palette
Side & Rim View

Bowl Design

Small leaves or a repeating outer band

Best Placement

A decorative band around the outer wall or an approved paintable rim area.

Design Tip

Avoid hiding your main illustration deep inside the bowl where it is harder to see.

Sample color palette

Pottery Painting Ideas for Beginners

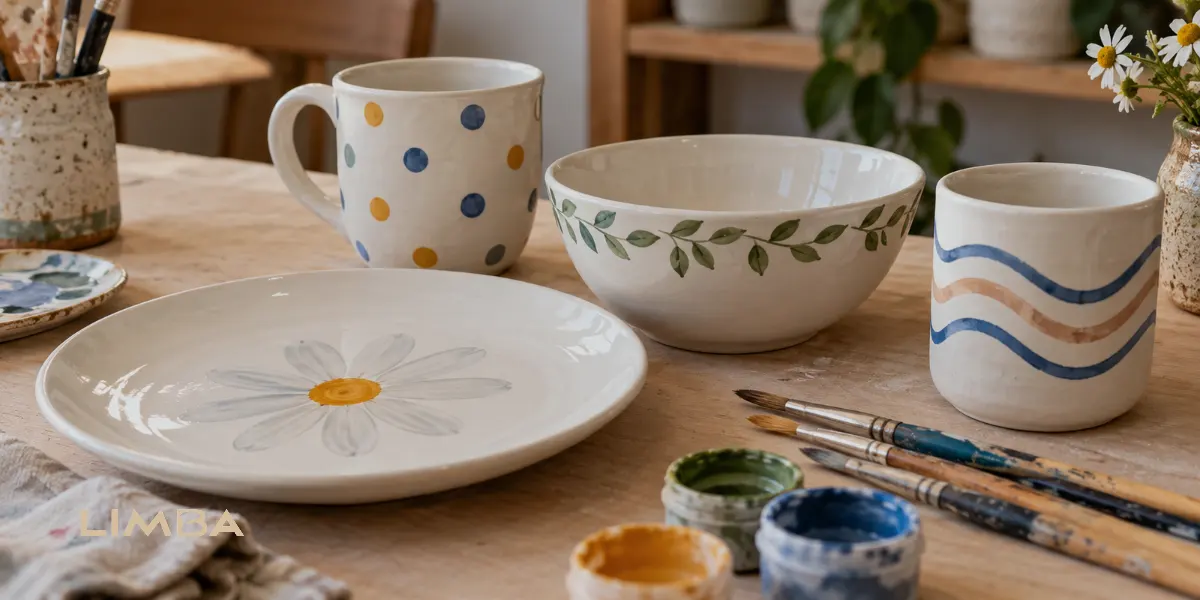
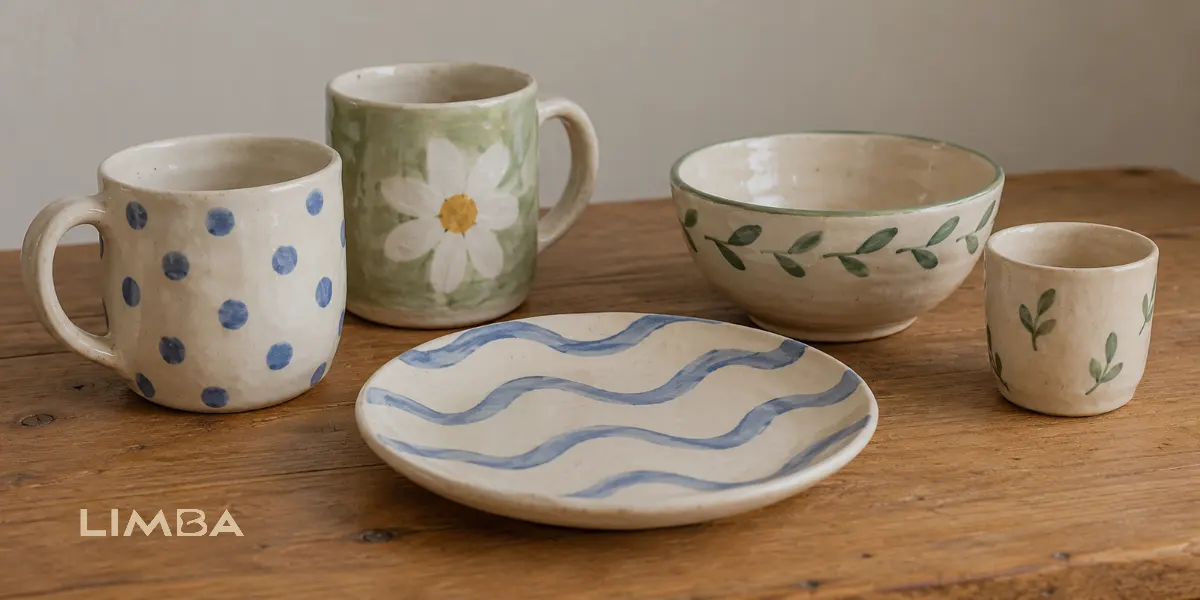
You do not need a complicated pattern to make your pottery look good. Some of the easiest pottery painting ideas for beginners are small flowers, scattered dots, wavy lines, and simple leaves. These designs are forgiving because slight differences in shape or spacing can make them look more natural. Detailed portraits, tiny lettering, and perfectly straight patterns are harder to control when you are new to painting.

The shape of your pottery can also help you choose a design. A plate works well with a central flower or a simple circular pattern. For a mug, repeating small shapes around the outside can look more balanced than one large illustration. If you are painting a bowl, try a pattern along the rim rather than
a detailed design on the curved interior.

A Few Easy Designs to Try

• Daisy Plate: Paint one large daisy in the center of a plate, using white petals and a yellow center.
Leave the surrounding space plain.
• Polka Dot Mug: Add small dots in two complementary colors around the mug. Vary their sizes
slightly for a relaxed, hand-painted look.
• Leaf Pattern Bowl: Paint small green leaves along the outer rim, leaving enough space between them so the pattern does not feel crowded.
•Wavy Line Cup: Use a thin brush to paint two or three gently curved lines around the cup. Choose contrasting colors to make the lines stand out.

If you cannot decide between two ideas, choose the one you can draw comfortably without constantly correcting the lines. You can always add small details later, but starting with a design that is too complicated can make the painting process frustrating.

Pottery Painting Ideas for Beginners How to Plan Your Design

How to Plan and Sketch Your Pottery Design

Once you have chosen your idea, spend a few minutes planning where each part will go. Start by drawing a rough outline of your pottery on paper. You do not need a perfect sketch. Just mark the main design, its approximate size, and the space you want to leave around it.

For example, if you want to paint flowers on a mug, sketch three or four flowers first and check how they fit together. Leaving some empty space between them often makes the finished design look cleaner. You can also try different arrangements on paper before committing to one.

Planning Designs for Mugs, Plates, and Bowls

Each ceramic shape needs a slightly different approach to plan

  • Mugs: Decide whether your design will appear on one side or wrap around the entire mug. Keep important details away from the handle.
  • Plates: Find the center before placing your main design. Use the outer edge for smaller decorative details.
  • Bowls: Think about how the design will look from above and from the side. A large illustration inside a deep bowl may not be fully visible.

Before painting, look at your sketch from a distance and check the proportions. If you are attending a workshop for bisque ceramic painting in Dubai, ask your instructor whether you can lightly mark guidelines on the ceramic surface. This can help you position your design more accurately without constantly changing it as you paint.

Pottery Painting Ideas for Beginners How to Plan Your Design

Choosing Colors and Painting Techniques for Your Design

Before you start painting, choose two or three colors that complement each other. For example, soft blue and white can create a calm, simple design, while yellow and green work nicely for flowers and leaves. If your design has several small details, keep the background neutral so the patterns are easier to see.
Remember that ceramic colors can look different after glazing and firing. A pale shade might become richer, and some colors may change slightly in the kiln. Ask your pottery studio to show you fired color samples before making your final choice.

Simple Painting Techniques for Beginners

You can create attractive designs with just a few basic tools:
• Brush Painting: Use a wide brush for larger areas and a thin brush for flowers, leaves, or outlines.
· Sponge Painting: Gently dab color onto the surface to create soft backgrounds or textured effects.
• Dot Painting: Use a dotting tool to make small flowers, decorative borders, or repeating patterns.

Start with larger shapes and background colors, then add smaller details once the paint has dried enough for the technique you are using. Follow your studio’s instructions for applying additional layers, since different ceramic paints behave differently. This helps prevent unwanted smudges and keeps your design looking clean.

A Quick Design Checklist

Before your brush touches the ceramic, take one last look at your plan. A few quick checks can save you from mistakes that are difficult to fix once the paint is applied.
• Check the placement: Make sure your main design is visible from the angle people will normally see your pottery.
• Leave enough space: Avoid placing small details too close together, especially on curved surfaces.
•Test your colors: Check fired color samples at the studio rather than relying only on how the paint looks in the bottle.
•Plan your painting order: Decide which areas need to dry before you add another color or detail.
• Check the studio guidelines: If you found a workshop by searching for pottery painting Dubai, ask which surfaces you can paint and whether any areas need to remain unpainted.
For example, imagine you are painting a white mug with blue flowers. Before starting, hold the mug by its handle and check where the flowers will be most visible. Position the largest flower first, then add smaller ones around it. This gives you a clear starting point without having to improvise the entire design.

Your Design Does Not Have to Be Perfect

The best pottery painting ideas for beginners are often the ones you can enjoy creating without worrying about perfect results. Keep your design manageable, give yourself room to experiment, and remember that small imperfections are part of what makes hand-painted pottery personal.

FOLLOW LIMBA ON GOOGLE

Want to see more from Limba?

Add Limba Studio as a preferred source on Google for more pottery guides, creative ideas and studio stories.

Frequently Asked Questions

A few useful answers before you start painting your pottery.

01 What are the easiest pottery painting ideas for complete beginners?

Start with dots, simple flowers, wavy lines, or small leaf patterns. These designs do not require precise drawing skills and still look attractive when the shapes are slightly uneven. If you are painting your first piece, try one simple pattern rather than combining several complicated designs.

02 How can I keep my design even on a curved mug?

Plan the placement before painting and use a few visual reference points around the mug. Rotate the mug as you work instead of stretching your hand around it. For repeating patterns, leave slightly more space between shapes than you think you need. This makes small spacing differences less noticeable.

03 Will ceramic paint colors look the same after firing?

Not always. Some ceramic colors become deeper or brighter after glazing and firing, while others change more subtly. The result depends on the paint and firing process. Ask your studio to show you finished color samples rather than choosing only from the paint bottles.

04 How many layers of ceramic paint should I apply?

The number of layers depends on the paint and the finish you want. Some colors need multiple coats for an even, opaque result. Follow the studio's instructions and allow each layer to dry as recommended. Applying too much paint at once can make the surface uneven.

05 Can I fix a painting mistake before my pottery is fired?

Often, yes, but the correction method depends on the paint. Some water-based ceramic paints can be adjusted before firing. Ask your instructor whether you can use a damp sponge or a small brush to correct the area. Avoid scraping the ceramic surface without guidance.

06 Is it safe to paint the inside of a mug or plate?

Only if the studio confirms that the paints, glaze, and firing process are suitable for food-contact surfaces. Some decorative materials should not be used where food or drinks will touch the ceramic. Ask which areas must remain unpainted before decorating your mug or plate.

Leave a Reply

Your email address will not be published. Required fields are marked *